Learning Objective: Understand some basic methods of working with chocolate
Working with chocolate
Creating the right conditions, using the right tools
The ideal kitchen or production space temperature for working with chocolate is 64 -70°F (18 - 21°C). You want the humidity somewhere between 50 - 65%. If your workspace differs from the recommendations in either temperature or humidity (or both), you'll need to experiment and compensate when practicing your techniques to be successful.
Am I buying tempered or untempered chocolate?
The two smooth shiny discs below are examples of correctly tempered dark and milk chocolate. The other two discs show you what the same chocolate looks like when it has been allowed to harden without being tempered.

ALL chocolate you buy in a hardened form has been tempered before it hardened or it would be dry and crumbly, with an appearance like the example in the image above.
The tempering is a "process" used to achieve the Form V as the chocolate hardens – it is not a state of being, i.e., either tempered or untempered chocolate.
Any time you melt chocolate over 90°F (32°C), you melt the fatty acids and destroy the crystallized Form V, so you must temper it again before you mold or enrobe with it.
For Chocolate Makers: Tempering is the second-to-last step done before molding chocolate or couverture into bars or wafers for sale to chocolatiers or consumers.
For Chocolatiers: The minute a chocolatier melts bulk chocolate or couverture over 90°F (32°C), the crystallization is destroyed so the chocolate must be tempered again to produce an abundance of Form V crystals before using to mold or enrobe.
Much, much more about tempering to come later in the curriculum.
Chopping chocolate
One of the biggest production processes is chopping up big blocks of chocolate. Once you've chopped up a block, you'll understand why bulk chocolate in pistole or wafer forms are so popular. I had to laugh when I recently visited a well-known chocolatier (who shall remain nameless) and found her hammering big blocks of chocolate propped up on the floor while the chocolate was still in its protective wrapper – don't know if the health inspector would like that but it got the job done for her and kept the mess to a minimum!
For an alternative to the above solution, you'll want a large, thick plastic cutting board stabilized by a damp cloth between it and your counter. Your weapon of choice could be:
- Ice pick. This old fashioned tool is what we used and it worked very well.
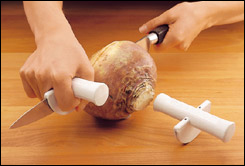
- Clam or oyster knife. With its rigid blade and easy to hold handle, it works well. Some oyster knives also have a handle guard.
- Chipper. Works like a mult-pronged ice pick, but the prongs are a little thicker so it's harder to pierce the chocolate.
- A thin chisel and hammer is not as fast as an ice pick, but easier on the hands when you're chopping a lot.
- A large, good quality, professional serrated knife – don't get a thin bread knife as you'll need a substantial knife in the 9- to 12-inch (22- to 29-cm) range to make this work well (a regular blade could slip across the hard surface of the chocolate).
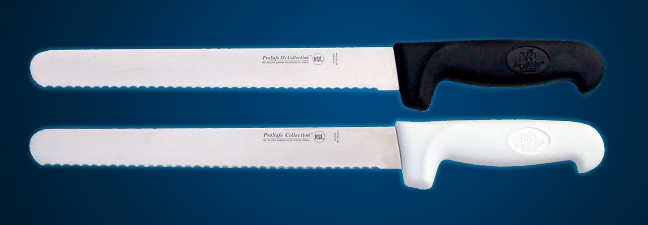
The knife above from are a good example of the style. Notice how the blades and handles are substantial.
You don't need a point on the end – in fact, it would get in your way.
Use a rocking motion with one hand holding the knife and the other pressing down the blade.
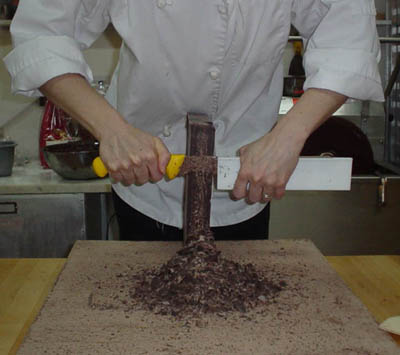
Joanne Mogridge of CocoaWest demonstrates this chopping technique. She sets the chocolate bar up on-end, long side down and shaves down the bar stopping about an inch from the bottom. When done, she then chops up the remaining bottom piece. Notice Joanne is using a heavy plastic Blade Guard from Lee Valley Tools' Gardening Catalogue to protect her fingers while chopping.
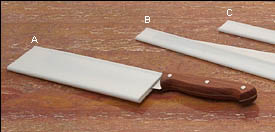
Lee Valley Tools also carries a knife guard
like this as another alternative.
Melting your chocolate:
Microwave:
As recently as four years ago, using a bain-marie would have been the only way I would recommend heating chocolate for tempering. But I am now convinced that chocolate can and should be melted safely in the microwave on 1/2 the power! In many chocolate laboratories I've seen plastic or stainless steel bowls of chocolate go in and out of the microwave to melt and reheat. No messy water baths, no added humidity in the air and the ability (once you get familiar with how much heat your microwave puts out) to raise temperatures minutely.
So I am now recommending everyone use the microwave for melting and reheating chocolate. BUT you have to test your microwave first. As no two microwaves are the same, you need to spend the time to learn exactly how much time it takes to raise a mass of chocolate to specific temperatures. I can't help you with this.
You should make a grid with the types and amounts of chocolate down one side and a selection of different temperatures across the top. Then experiment carefully with heating your chocolate noting how much time it took a specific amount to reach a certain temperature. Once you have gone through that process, you should get a feel for times and amounts in order to make sure you never burn or overheat the chocolate.
If you're buying a new microwave for your chocolate laboratory, you might want to consider looking at machines made for commercial purposes; Panasonic has several models off differing sizes and power settings.
Bain-marie/double boiler
You can still use a double boiler if you don't have a microwave but I don't recomend it as you'll run the risk of extra humidity in your environment (which creates problems with tempering) and contaminating your chocolate with water.
The chocolate is placed in the top of a double boiler or bain-marie, which is a method of cooking gently in one vessel placed inside another containing hot water (note: this is never simmering or boiling water). It is important when using a bain-marie that no drop of water or steam from the bain-marie falls into the chocolate as it will cause the chocolate to "seize," becoming gritty and granular. If you are going to melt this way, make sure to cover your bowl full of chocolate tightly with plastic wrap as it melts to reduce the impact of humidity.
You don't have to buy fancy double boilers. A stainless bowl that fits on top of a saucepan works just as well. Make sure the bowl is large enough so that it fits into the saucepan but still is raised about 2 inches from the bottom of the saucepan. For example, use a 3-qt. (3 L) saucepan on which you place a 5-qt. (5 L) stainless steel bowl – that's a bowl about 11 - 12 inches (27 - 29 cm) in diameter, in case you've rubbed off the volume measure on the bottom of your bowl over the years like I have.
Then fill the saucepan with only 1 inch of water and heat until hot, but not simmering or boiling. Place your bowl on top of the saucepan, add your chocolate and then TURN OFF the heat. You'll want to use the heat from the passive steam to melt your chocolate slowly to ensure you do not overheat and burn it. If the chocolate has not melted fully by the time your water has cooled, you may need to turn the burner on again to create more steam.
In either method, the chocolate mass is stirred to keep it from getting too hot, either from hot spots in the microwave or in contact with the bottom and sides of the pan in the double boiler.
- Dark chocolate needs to be stirred occasionally as it melts and heats.
- Milk chocolate, because of its milk fats, needs to be stirred more often than dark.
- White chocolate needs to be stirred almost continuously during the heating process because of its high sugar and milk fat composition.
Speaking of stirring, one of our graduates loves this little gadget, Robostir, for keeping the half-melted chocolate from developing hot spots and to keep tempered chocolate agitated while you use it for hand molding or dipping. I haven't tried it myself. You'll just need to be using a flat-bottomed pan or bowl.
Storing your chocolate:
You want to protect your chocolate from heat, moisture and dirt. If you live in a temperate or colder climate, the bottom of your linen closet or a kitchen cupboard (that is away from equipment such as refrigerator, stove or dishwasher) will be perfect. Keep the chocolate in its original box/bag or in a clean plastic or metal container. Storing it in a plastic bag can trap moisture and possibly transfer an odor, so a container where the air can move around the chocolate is better.
In warmer climates, you may want to put your chocolate in the refrigerator. Again, make sure it's in a well sealed plastic or metal container so that it doesn't pick up smells from the other ingredients, and put a couple of layers of paper towel around the chocolate to absorb any moisture. You'll want to bring your chocolate in the container to room temperature before opening the container. This keeps the cold chocolate from pulling moisture from the air and forming condensation as it comes to room temperature.
Some students have used their wine cellar or refrigerated wine cupboard, which works perfectly. Just make sure the humidity is set low.
Perfect temperature range is 55 - 68°F (13 - 20°C). Solid chocolate can be at the high end of the range and bonbons (especially those containing ganache) at the lower end of the range.
Note: Working with chocolate at high altitudes
I occasionally get this question from students: "Is there a difference in working with chocolate at high altitudes?" I've searched the web and looked in both of my science of chocolate books for any mention that high altitude is a factor in working with chocolate and there doesn't seem to be any difference.
Note: Working with chocolate in warm climates
If you live in a warm climate, please be aware of this reality: You will need air conditioning for both your production and storage facility when you go into commercial production, so make sure that is in your operations plans. It is a fact of life in the chocolate industry.
You certainly can complete the technique assignments in this program without a fully air-conditioned space (lots of students from Florida to Thailand have), but you'll encounter problems if you let your work space get too much warmer than 70°F (20°C).
If you can't afford to air condition your work space, you'll need to get creative, such as working in the very early morning (at the coolest time of day), using refrigeration to harden dipped and molded items quickly, using ice on your marble slab to reduce its temperature before you temper, etc.
There are no hard and fast rules regarding temperature and humidity; both have an impact on chocolate making. You'll need to experiment with the different tricks noted above to find the combination that allows you to produce the perfect product.

 留言列表
留言列表